

Design Leather And Using Tools
Part 1: How I Design & Make Leather Bags.
An insight into the design process and construction behind a few of my pieces.
![]()
I love the challenge of figuring out how somethings made. To me, it's like a big puzzle waiting to be solved, and when you do, the accomplishment and pride in your work is one of the best feelings.
From a young age I've always been surrounded by makers. On my m other's side, my Nana was an artist and my Pop was an engineer. On my father's side, my Grandfather was a leather goods maker. He used to design and make bags for Western Australian miners back in the 1960's. This trade was passed down to my father, who is now passing it down to me. Which I'm immensely proud of.
For me, getting on the tools and crafting a physical object is a great outlet. Its nice to get away from the screens and technology that I'm surrounded with everyday as a UX Designer. To make a bag I follow the same process that can apply to any medium of design. These are the stages I work through.
Define the Problem You're Trying to Solve.
While having something that is aesthetically beautiful is important, it's imperative that you design with functionality first in mind. What is the core problem that you're trying to solve? What is the missing gap that this bag will fill? Questions you need to ask yourself might be, what context will I be using this bag in? What items will need to fit into it? Where will I be taking it?
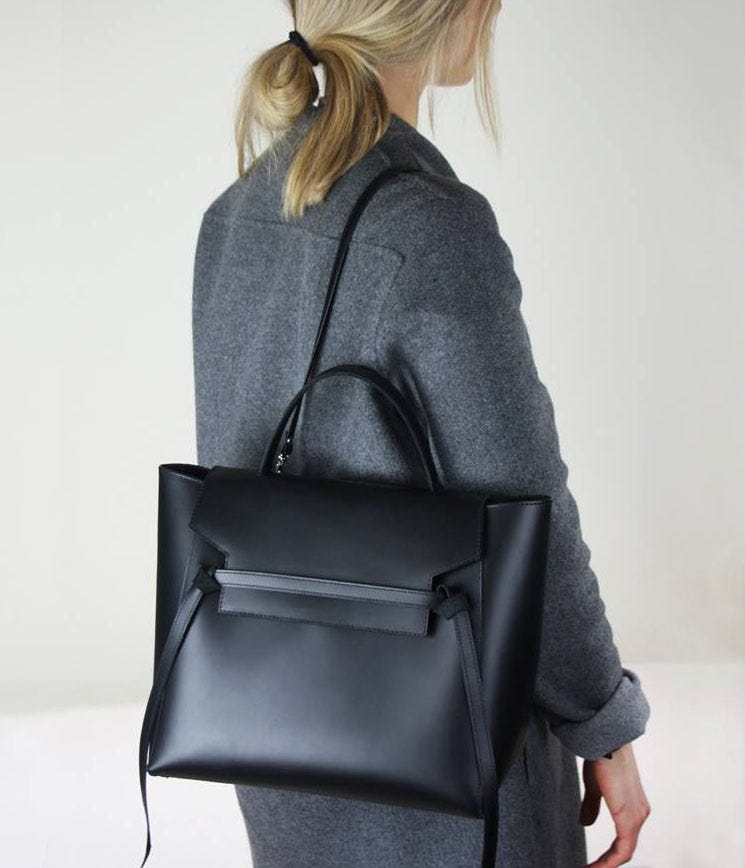
Case 1: The work bag
I always feel a bit awkward carrying around a backpack around in fancy bars after work. So I needed a bag that had the same functionality as my backpack, but stylish enough that I could take it out. For along time I had my eyes on a $4,000 Celine Bag. It was visually perfect, but it wouldn't have fit my laptop or sport gear, nor did it have a longer strap. So buying it would have been pointless.
I decided to re-create it myself with a few tweaks to suit my needs. The size was designed to perfectly fit my belongings and a short clip on strap was added so that I could swing it onto my back like my backpack.
Case 2: The night bag
On a few occasions, I've found myself in need of a small black, simple shoulder bag to use on nights out. I drew from past experiences and problems I've had with going out bags. I knew that it would get dirty on the inside so I made the bag with plastic lining so it could be wiped clean. This, along with a zip closure that ensures my belongings are secure and won't fall out.
Research and Planning
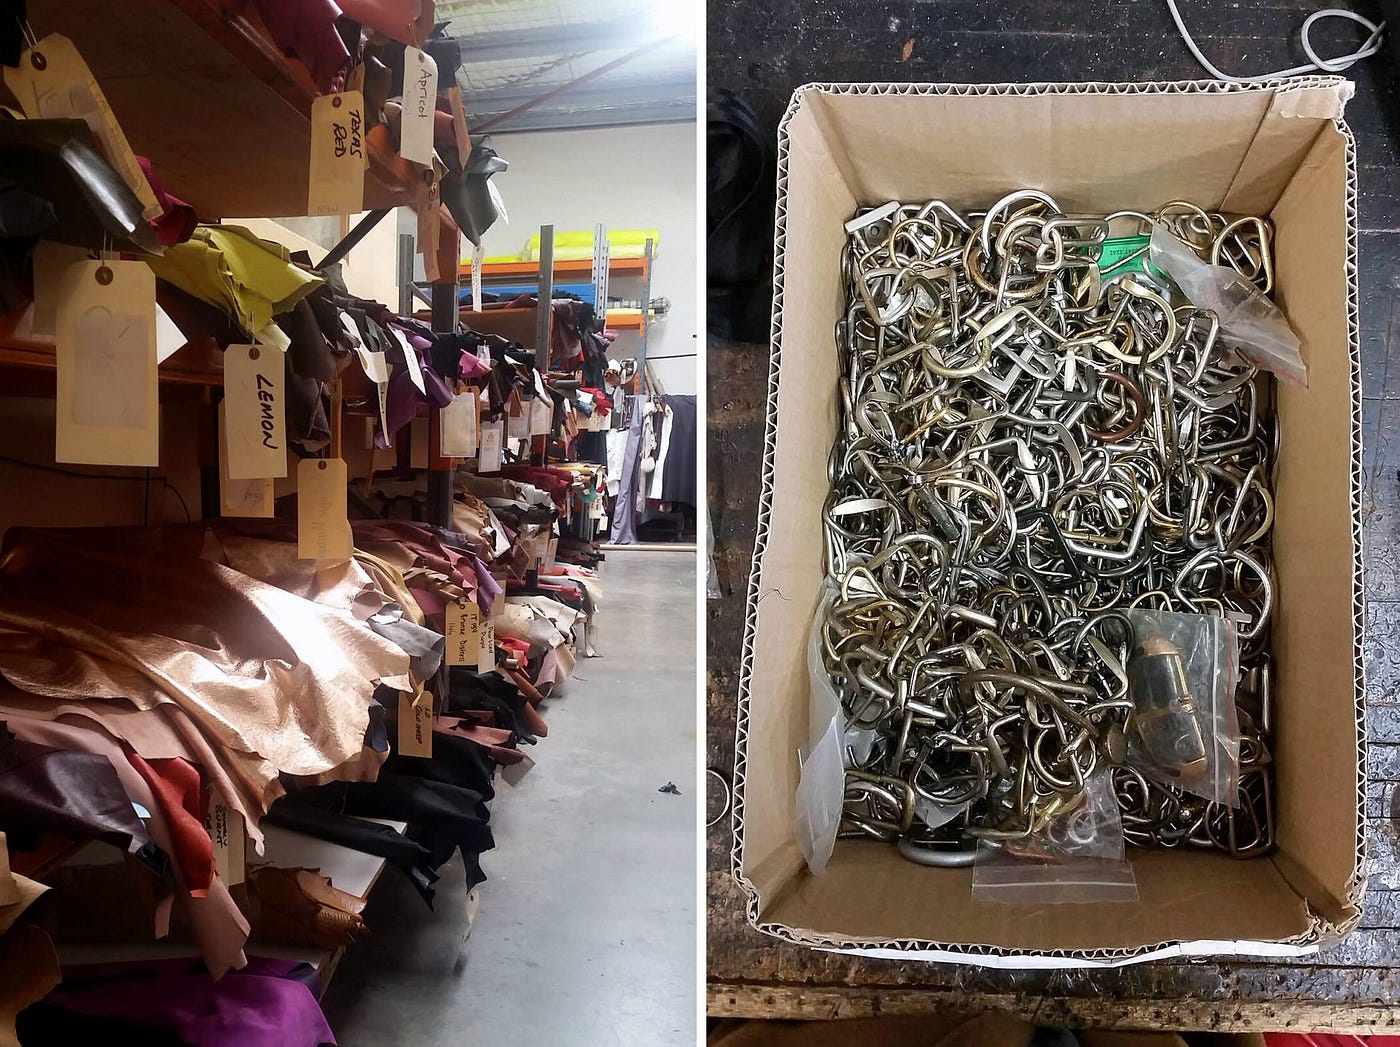
Leather hides aren't exactly cheap, so planning your design will save you a lot of time and money. I'll research designs that currently exist and take inspiration from elements that I like. I'm obsessed with the videos that show how designer brands make their bags. They're a great resource because a lot of the time they'll follow the same methods that you could do as well.
Prototyping
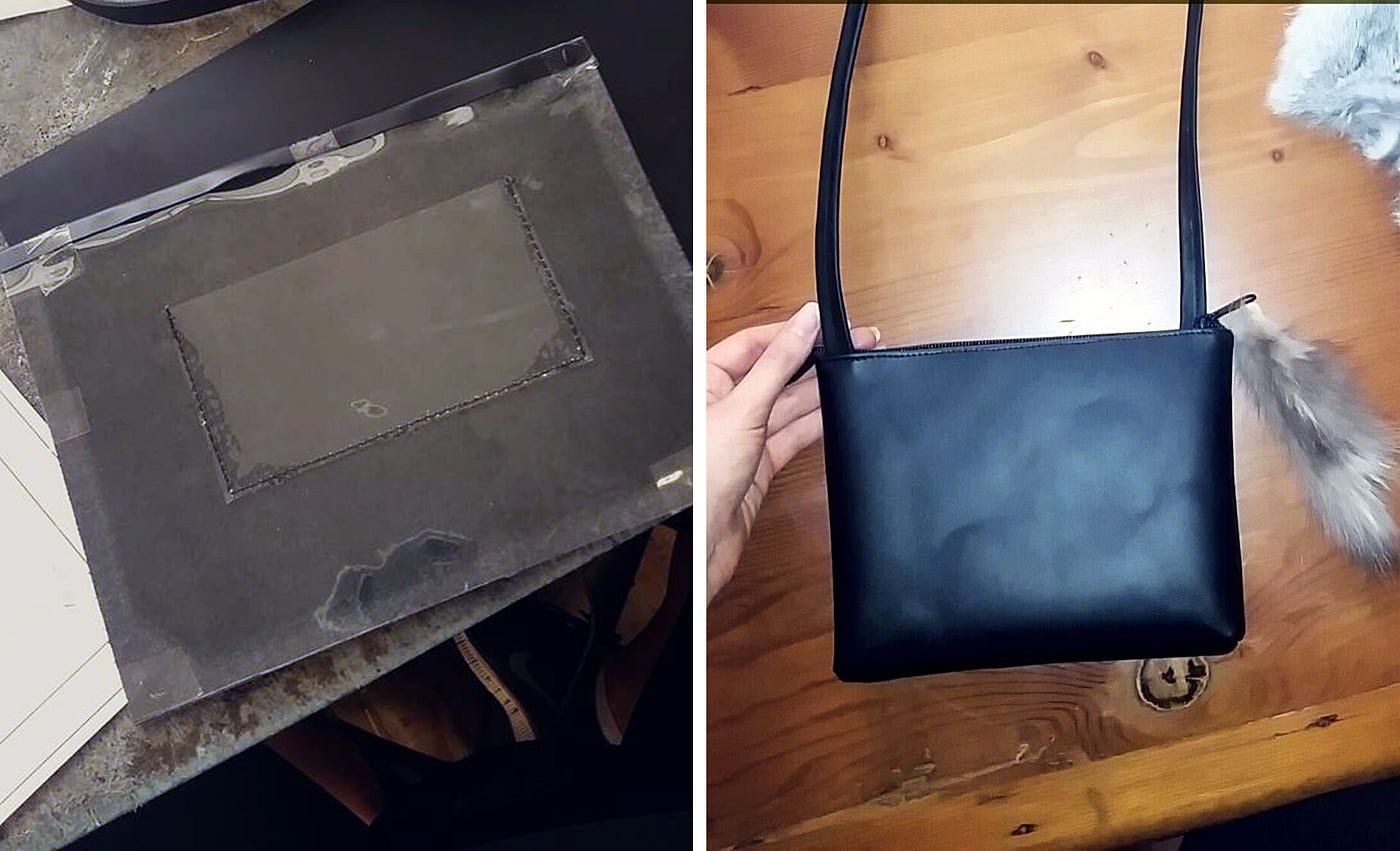
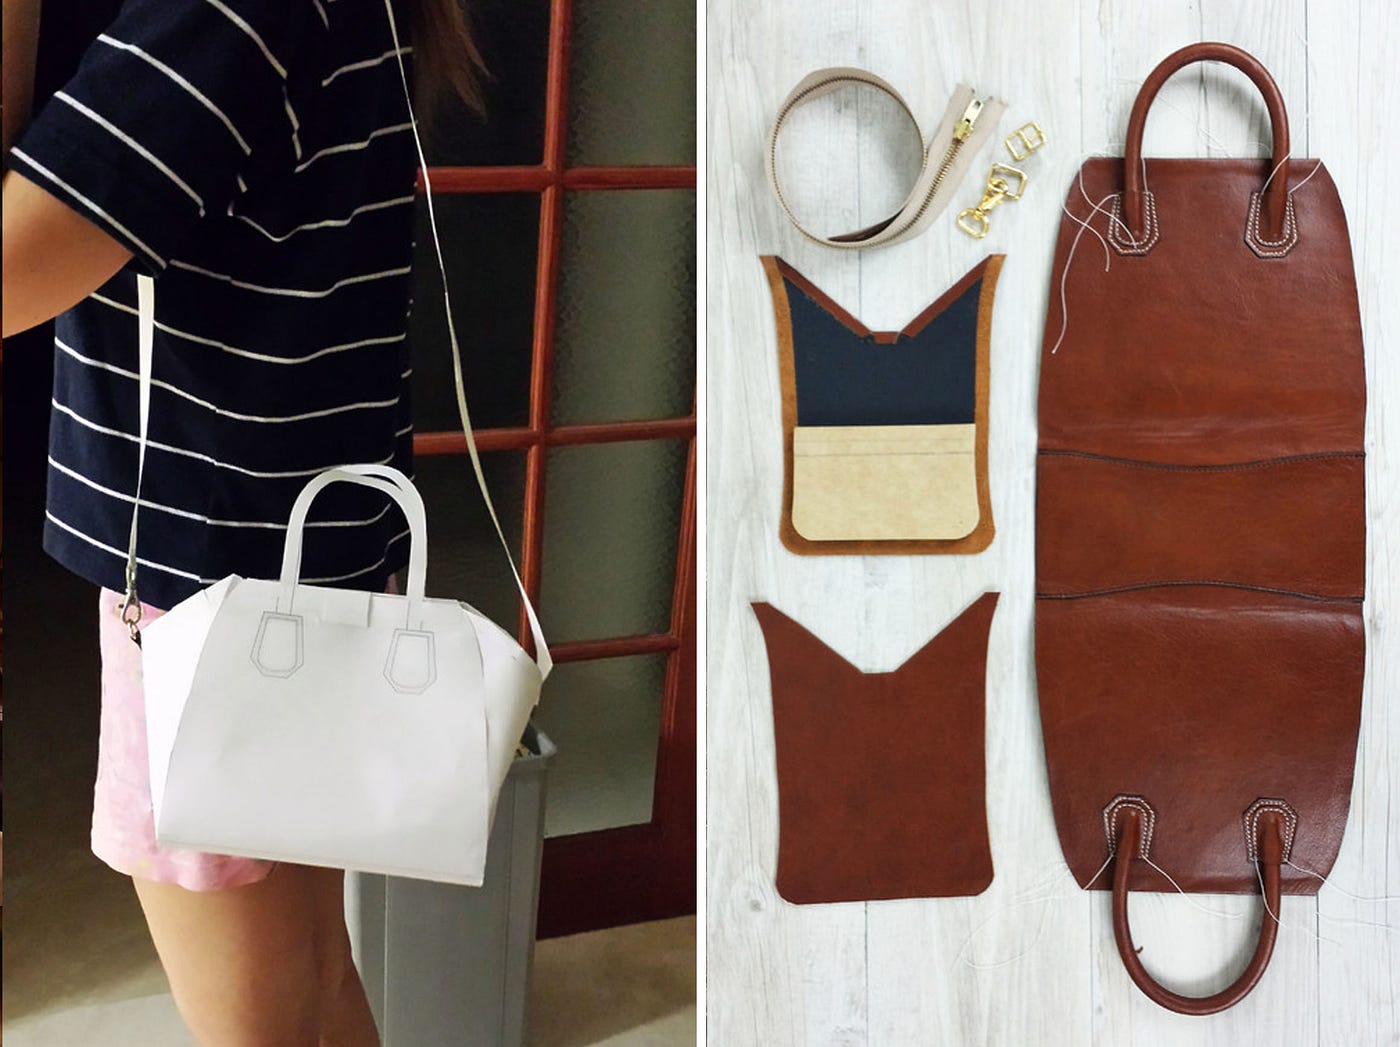
I'll first begin by creating paper prototypes. For each model I make I'll go back and forth tweaking the pattern to get the shape and size just right. The prototyping phase is a great time to make sure all the real objects you'll be placing in the bag will fit.
Its also a good idea to wear the paper prototypes around to get an idea of the sizing and how it sits on the body. The image below is an example of me testing the true contents. My gym clothes and laptop needed to fit into it otherwise the bag's existence would be worthless.

I'll use paper to get the size, shape and pattern. Plastic to test the structure and cheap leather for stitching and joinery tests. Remember, this is a constant back and forth cycle. You'll get to a point where you need to decide on a pattern to take into the creation stage.
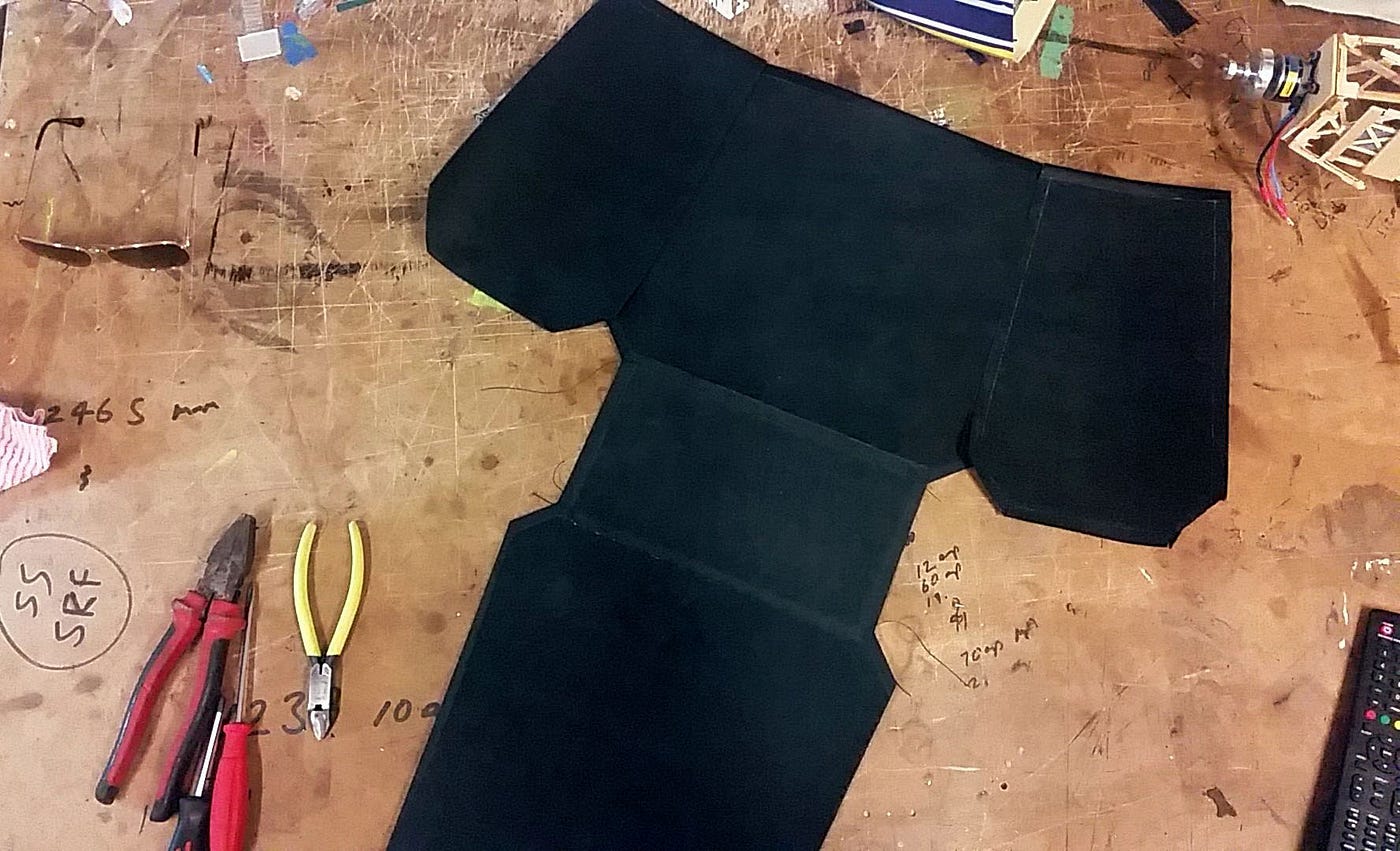
Pattern Making
Pattern making occurs at the same time as prototyping as I refine and improve each design. I'll create a more finalised pattern when I'm ready to translate it to leather.
I draw my patterns with AutoCAD, which is a drafting program I learnt during my time studying Architecture. With this program I can draw the pattern to scale with the exact measurements. I'll also define things like: the location of the stitches, where holes need punching and how much overlay I'll need.

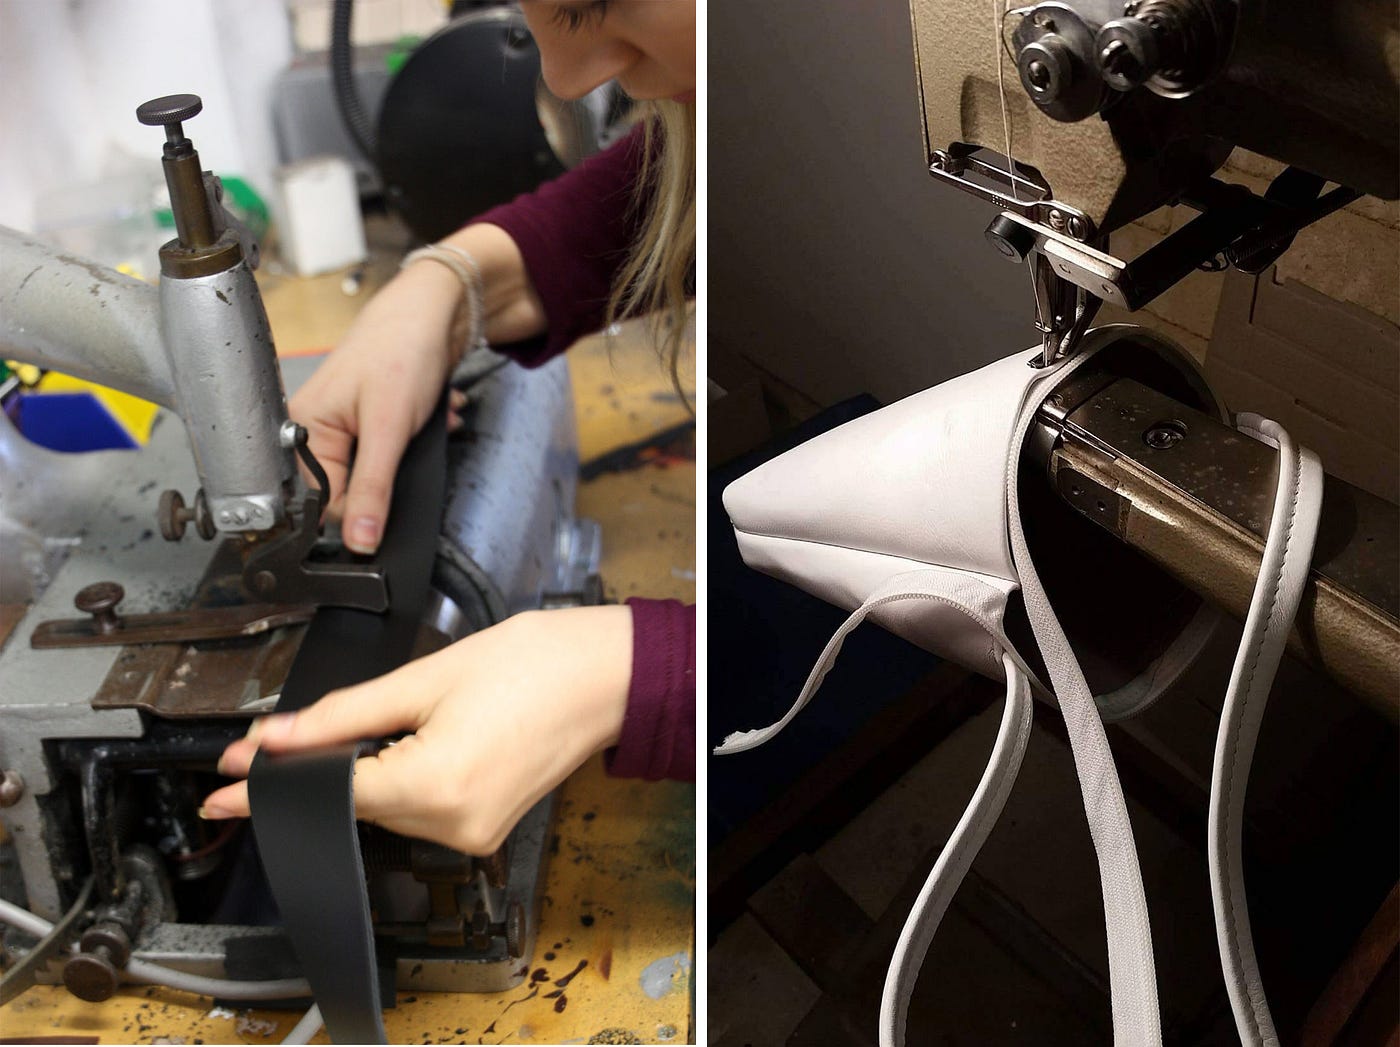
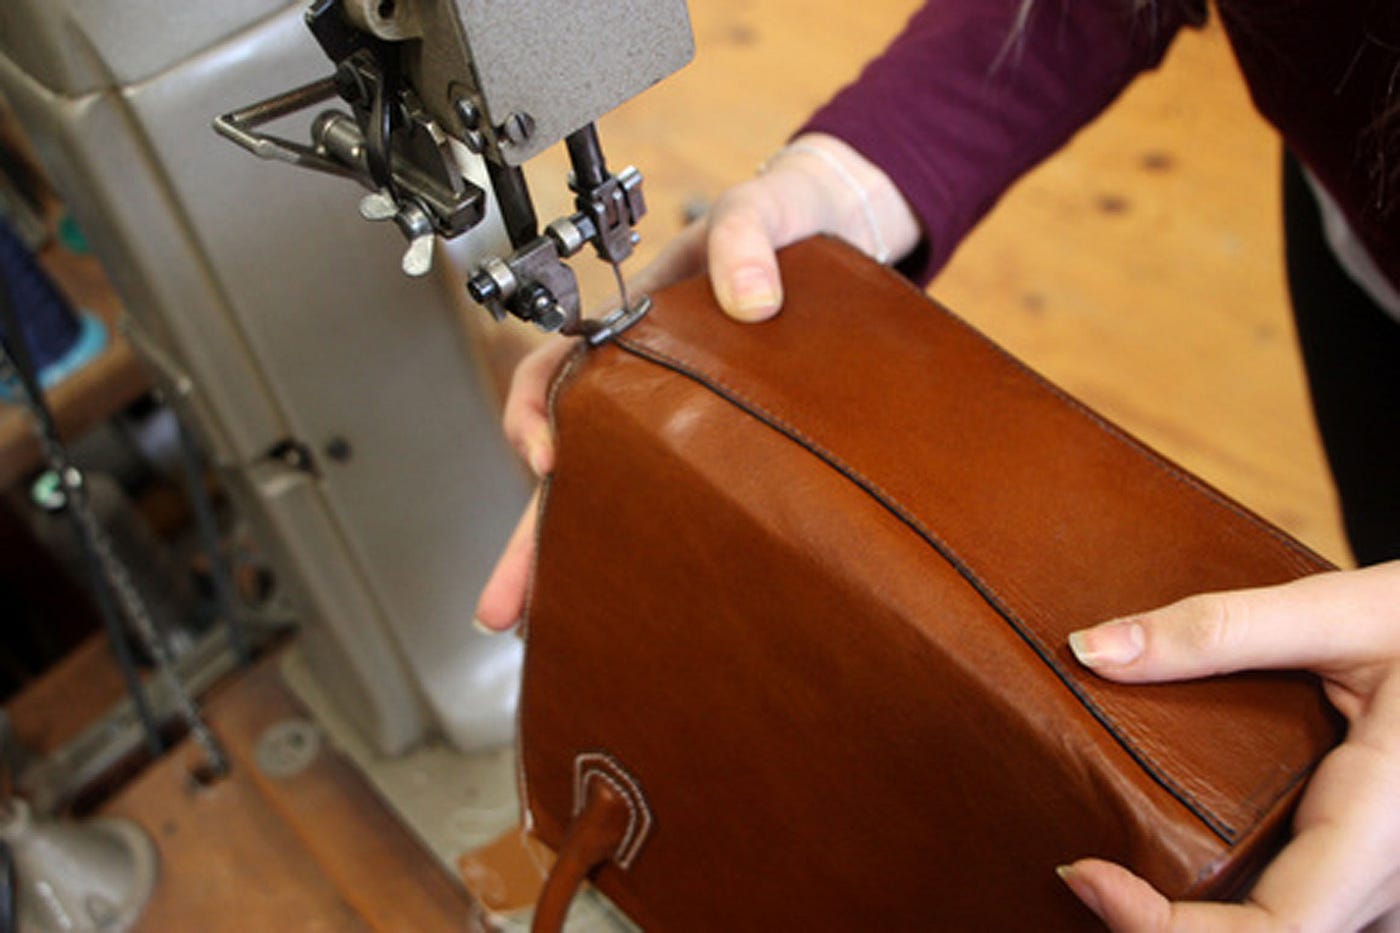
Creation
Now for the best part — getting on the tools. Unfortunately, I don't have much in the way of luxury hardware so I try to avoid the use of it where I can and let the functionality and form speak for itself.
As I'm making it I'll jot down design notes such as: the order in which it was sewn together. How long the glue or edge coat takes dry and what sections I should have made first, and so on.
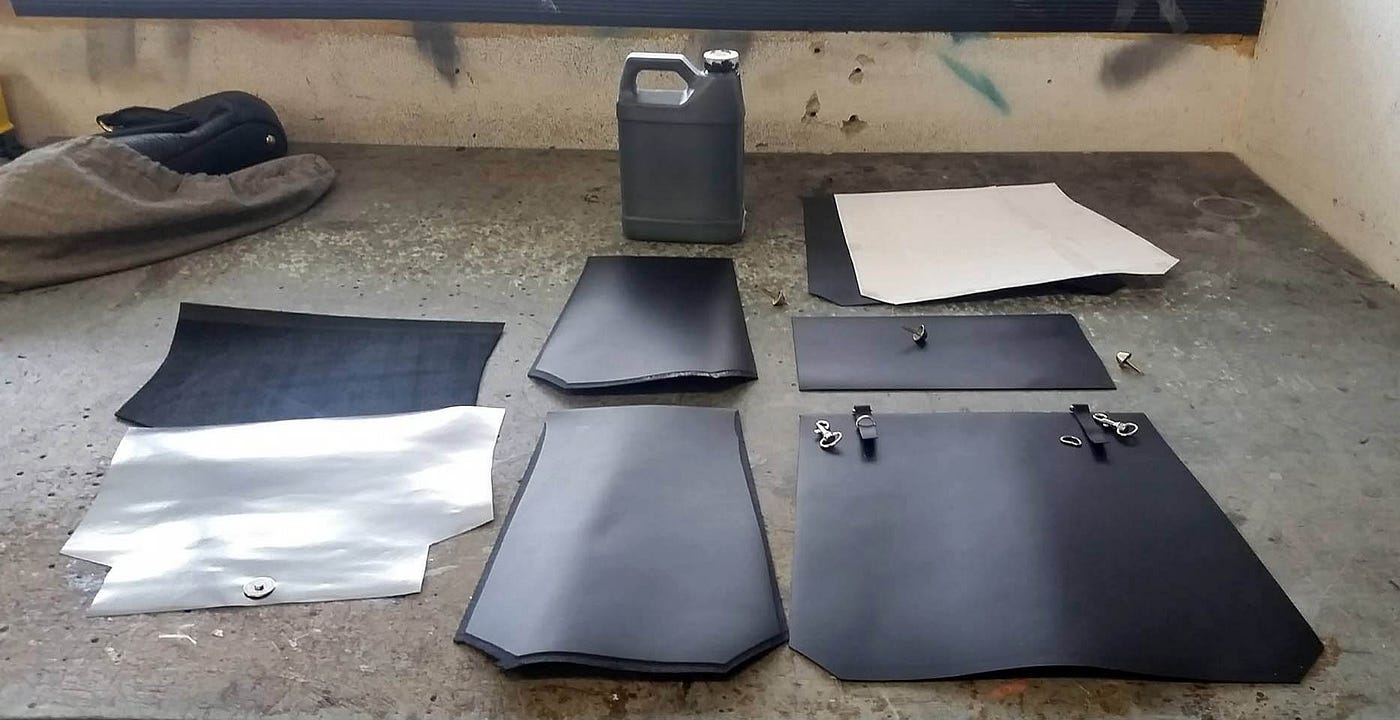
When it comes to the making stage, you need to have the right tools and machinery. You couldn't use a fabric sewing machine as it wouldn't be strong enough to sew through the thick layers of leather. I'm very lucky to have access to various types of machinery made for leather work. For example, a skiving machine thins down the leather. This allows you to create joins with a consistent thickness when you sew them together.
When something has been done wrong it's best to just move on and keep making it. I'll make note of mistakes, improvements or things I want to change for next time.

Iterate after using it in real life
After I finish a bag I'll use it for awhile before I consider making a new version. This way I'll discover things like construction defects and functionality issues. Along with how the leather has worn down and changed shaped. You may even find that you're using it in a different context to what you originally thought.

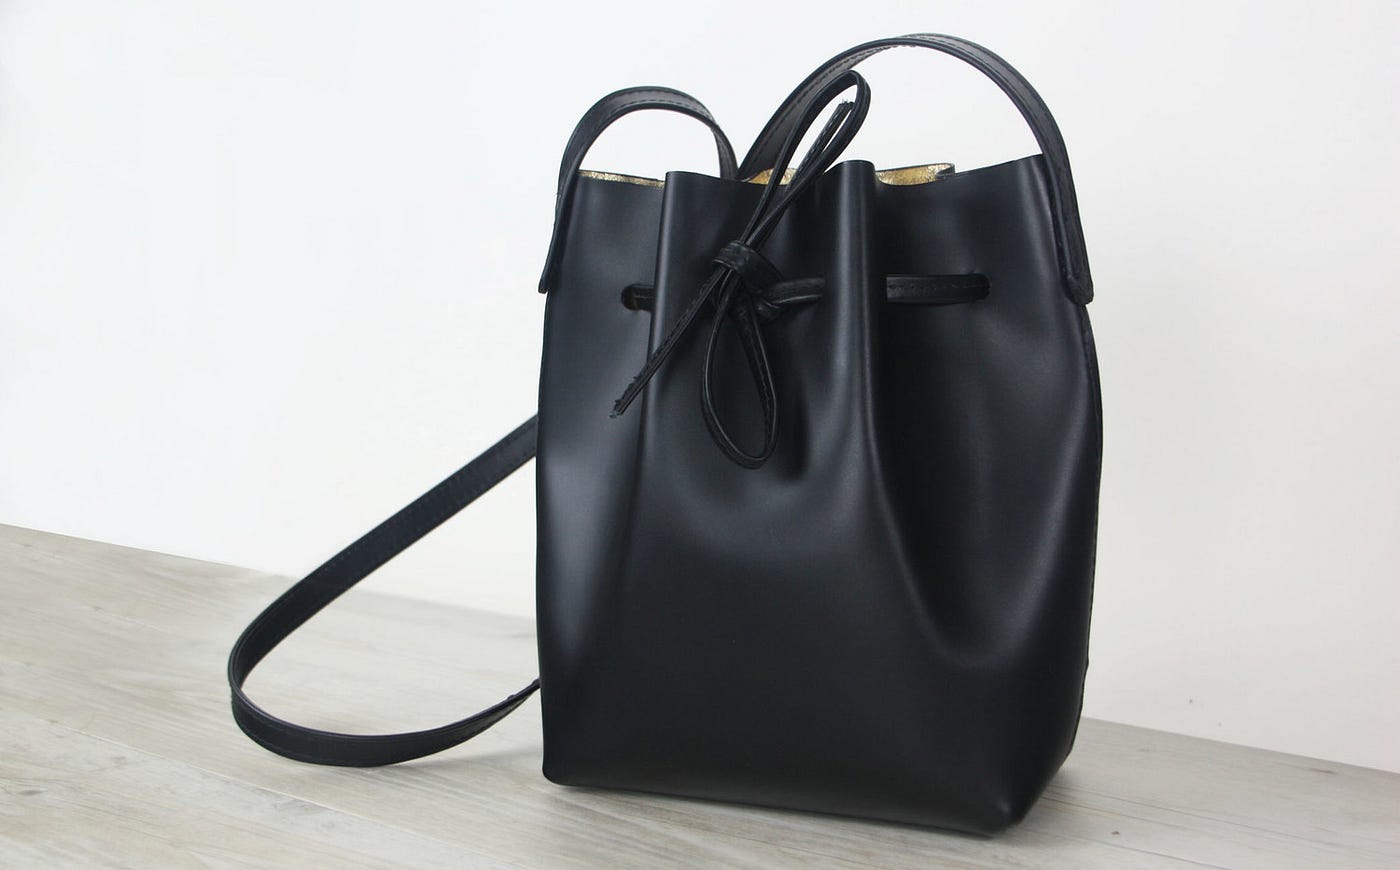
I made two versions of this bucket bag. The first, was shorter and had no lining. After using the bag alot I realised that I couldn't see the contents inside. So I created the second version with a bright gold goat leather interior. I also made it an inch taller because I felt the proportions were slightly off and my wallet was poking out from the top. Which isn't ideal when your in public.

Learning From Mistakes
This is an example of a bag I started to make. The leather was too soft to maintain the structured shape that I wanted so I added stiffening to each piece. I soon learnt that I assembled it in the wrong order because it was too stiff. I couldn't move it around the post sewing machine.
I abandoned this bag because I ran out of time to make a new one. As frustrating as it to 'throw away' something you put so much effort into, the mistakes you make are all valuable learning experiences. The things you learn each time can be used for in your future designs.
Design Leather And Using Tools
Source: https://medium.com/@alanabrajdic/the-design-process-of-how-i-design-and-make-leather-bags-e5e49b8a4415
Posted by: towerdenteoffores.blogspot.com
0 Response to "Design Leather And Using Tools"
Post a Comment