

Design Of Button In App
7 rules for mobile UI button design
![]()

Seven mobile UI design best practices for designing buttons that will make your mobile app pop in all the right places
Buttons are an essential component of mobile apps, but seem to be one of the most difficult UI design elements to lock in. Broken links, unclickable or unresponsive buttons and lack of visual feedback are but a few mobile button design botches we're seeing across the board.
So how do we design mobile user interface buttons that users won't be able to get enough of? Read on for our seven tips on designing stunning buttons that respond to user interaction and provide helpful, actionable feedback.
1 — Stick to the core UI design principles
When it comes to UI design principles for designing buttons, the most important thing to focus on is the button's purpose. Throughout the course of UI button design, from the Three-Dimensional rage and Skeuomorphism to the Flat design revolution and Floating Action Button fever, accessibility has been and remain priority for users. But in order for this to happen, buttons need to look like buttons. We're talking size, shape, and padding.
Who ever told you size doesn't matter has never designed a mobile button. The size and shape of a button can make or break the likelihood of user interaction. If the user can't identify a clickable element, they aren't going to interact with it.
Size
When 'tap' is the primary input method for your mobile app, Android's Material Design principles recommend that touch targets should be at least 48 x 48dp, with at least 8dp (or more) between them. This is to ensure balanced information density and usability.
Shape
In terms of shape, it really depends on what you're designing for. For instance, in android UI design, flat and raised material buttons should have be 36dp high, have a minimum width of 88dp, and have a 2dp corner radius (flat)/have a default elevation of 2dp (raised).
Padding
Padding, essentially white space around content or components, gives the UI breathing space and avoids overwhelming the user. Read more on white space in UI design here.
2 — Use color to make UI buttons look actionable
UI button visuals have undergone extensive changes over the years, but one thing hasn't changed: the use of color and contrast that guide users towards taking meaningful action.
Users crave predictability and familiarity, so use color to help them identify and interpret your app's content and interact with the right elements. Remember that whichever color palette you choose will determine how users will recognize and remember the elements in your user interface. The colors in your UI should help users navigate buttons and anticipate the actions behind each click, as well as match your brand.
Contrast should be used to help users choose between different buttons. Not being able to decipher between actions creates uncertainty for users and can slow down their journey, making for a poor user experience and quite possibly causing them to click away from your app.
Focus on recognition and clarity through color and contrast. UI button design rules for contrast are simple: high contrast for positive actions, medium contrast for negative actions, and low contrast for neutral actions. Make the user want to engage with positive actions by giving positive buttons the highest color contrast of all. Any neutral or negative actions placed next to it should have a lower color contrast to de-emphasize them.
Apple has light and dark color schemes, using contrast and translucency to prevent interface elements from becoming overpowering or underwhelming. Notice the use of high contrast for the active button (tab) selection in the below example:
![]()
3 — Help users prioritize tasks by removing friction on-screen
"Shadows are invaluable cues in telling the human brain what user interface elements we're looking at." — Erik D. Kennedy, UX Designer
When it comes to priority tasks, you should remove any friction that slows down the user's progress to ensure that they can follow through with the task. By pairing color and contrast with clever layering, relief and subtle shadow you can create the illusion of 3-D on a flat screen. This draws attention to promoted or primary actions and distinguishes them from surrounding UI elements. Similarly, drop shadow and highlights help users to interpret visual hierarchy and understand which components are interactive.
Consider adding highlights between the most important buttons to distinguish between primary and secondary buttons. The correct use of layering and shadow along with the proper positioning of elements will help you reach those higher landing page conversions because users will likely notice the Call to Action (CTA) button and engage.
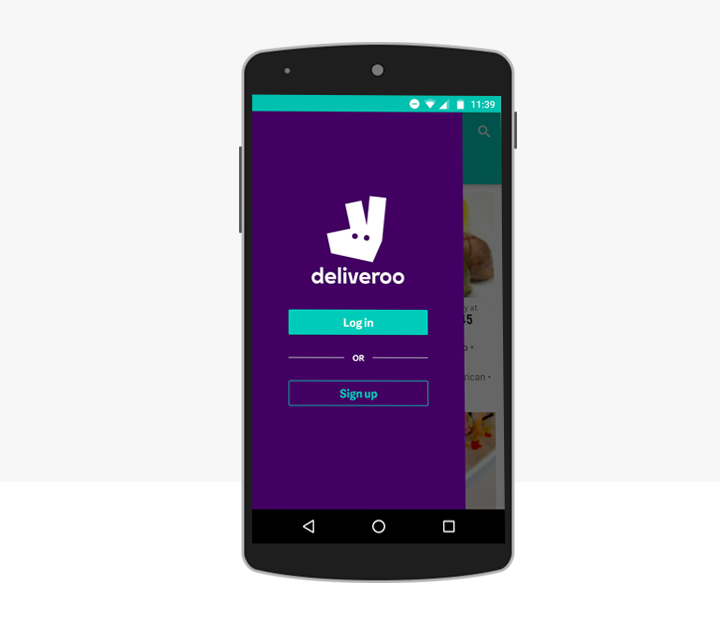
Ghost buttons, transparent with a basic rectangular or square shape, bordered by a very thin line, can be a good way of removing friction from your UI design. With a cleverly matched background, ghost buttons act as secondary content, drawing the user's attention to the primary content or buttons without overwhelming the user. Take our Deliveroo example below…The user has already logged in to the app via this mobile device and is therefore more likely to log in again than to sign up using this device. In response, the 'Log in' button has been highlighted and the secondary 'Sign up' button has been de-emphasized.
4 — Reward users with visual feedback
Rewarding users with feedback lets them know that they are doing something right (or wrong) and helps them discover what they can do next and understand the results of actions and interactions.
For every action, there should be a reaction
Feedback should play into each step of the user journey. As creatures of habit, it motivates users to know that they are doing something right. Designers can shape that feeling through helpful feedback. Remember that buttons are not one-state objects and we should always provide feedback on the task the user is about to/has just performed. A particularly important time to reward user interaction is right before they click on a primary button to perform an important task, e.g. sign up to a newsletter or download a free trial.
Feedback should be clear
Color changes to the button will show users that their action has been accepted. Subtle animations and motion will communicate the intention of the button and encourage the user to follow through with that click — happy user, happy you!
5 — Location: place buttons where users can find them in the UI
It's all well and good to design buttons that stand out and provide visual feedback. But if the user can't see the button, it's all been a waste of time. Location, position and order are key, so place your buttons where users are going to find them: in the user's path.
When designing for iOS, clarity, deference and depth are your 3 objectives. Buttons should be precise and lucid and should be placed for ease of scanning and to communicate the priority of the tasks.
In Android, the floating action button represents the primary action of your app and therefore only one is recommended per screen to represent the most common action, increase its prominence, and reduce decision fatigue by giving users the best, most distinct, and fewest options. It is placed 16dp minimum from the edge on mobile.
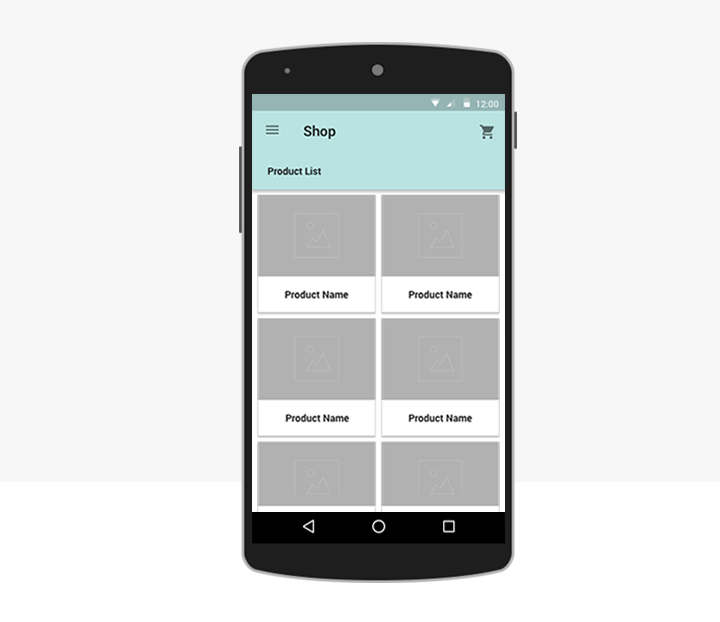
Use appropriate UI patterns that make the most sense for your content. For example, the F-Pattern will make the user scan across the page from left to right and then drop down to the next line and so on. This pattern works great for large amounts of web content, but may well overwhelm a mobile visitor. The grid is flexible pattern for mobile navigation and a great way to incorporate your newly designed buttons in your UI design. Find more ideas on mobile UI patterns here.
Tip: make destructive or negative action buttons harder to locate!
6 — Be consistent with defining design trends as well as your own UI design
We can get caught up in designing really unique ideas when trying to save the user a few clicks. But saving a click at the expense of consistent behavior is definitely not the best strategy. Maintaining consistency across all of your UI buttons will help users associate them with actions and click-through. That's what really counts.
Unfortunately, there's no one-size-fits-all solution to consistent mobile UI design. There are so many variables: it's not just about maintaining coherence with your own design, but also with similar apps and with each OS' UI guidelines. So do yourself a favor and read up on our interactive and intuitive mobile UI design tips to keep your button animation consistent and powerful.
7 — Make sure that your button does what it says it does with a label
"I'm not really into labels." — "Button it!"
There's nothing more frustrating for a user than being unable to complete an action due to incoherent or a complete lack of guidance. Label buttons with a clear message of what they actually do to avoid the user blues. Using clear and distinct labels with help you eliminate ambiguous user guidance and make for a seamless experience.
And remember, the most obvious label is the CTA. Make the most important button stand out but putting a label on it, like this:

Regardless of how you go about designing your UI buttons, you must test and validate them with real users. Prototyping make it easier by allowing you to create functional models of your UI assets and test them out on your target audience before adding any code. Download Justinmind now to start prototyping your best UI design!
Design Of Button In App
Source: https://uxplanet.org/7-rules-for-mobile-ui-button-design-e9cf2ea54556
Posted by: towerdenteoffores.blogspot.com
0 Response to "Design Of Button In App"
Post a Comment